In today’s evolving energy landscape, home solar systems are becoming smarter, more efficient, and easier to install. One of the key innovations driving this change is the microinverter—particularly, the reliable and high-performing models from Hoymiles. In this article, we’ll walk you through a detailed real-world installation of Hoymiles microinverters on a newly built solar carport, uncovering the planning, wiring, challenges, and final performance of the system.
Whether you’re an experienced installer or a DIY enthusiast planning your own solar project, this breakdown will offer valuable insights and practical tips based on firsthand experience.
Why Hoymiles Microinverters Were My Top Pick
Before diving into the setup, let’s talk about why Hoymiles was the microinverter of choice. Among the many brands out there, Hoymiles stands out for its:
- Modular options: single, dual, and quad versions
- High output efficiency
- Proven reliability over extended use
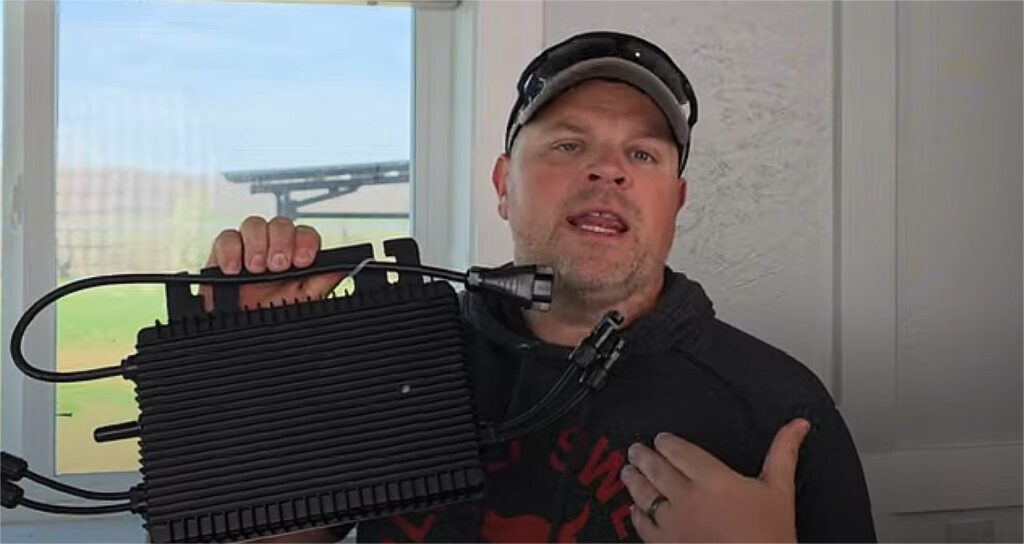
For this project, the HMS-1000 dual microinverter was selected. Each unit can deliver up to 958W—splitting 479W per panel. Given the 415W panels used here, that leaves a healthy margin for peak performance without excessive clipping.
Laying the Groundwork: Trenching, Conduit, and Wire
This installation began with some serious groundwork—literally. Based on code requirements, the conduit needed to be buried at least 18 inches deep. A 36-inch trencher was rented to ensure compliance and make way for a clean conduit layout.

The project involved:
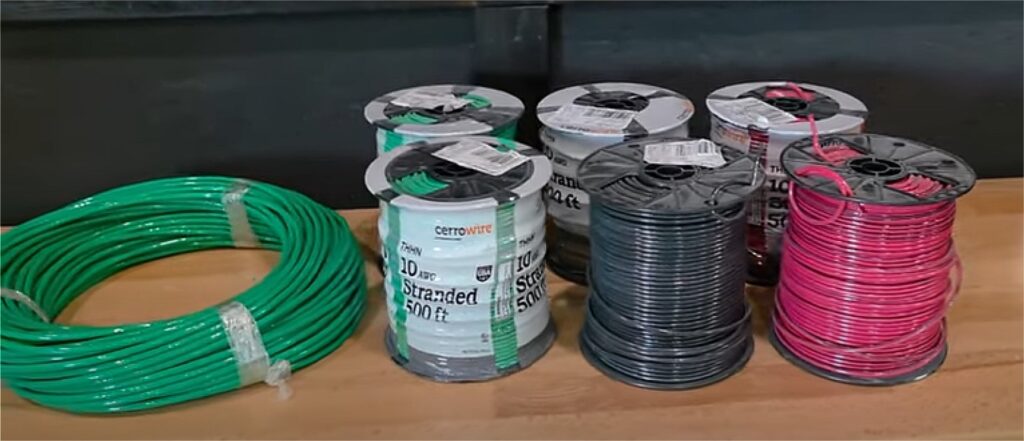
- Over 3,200 feet of wire: including black, red, and green 10-gauge wires
- Four solar array branches, each running over 200 feet to the combiner box
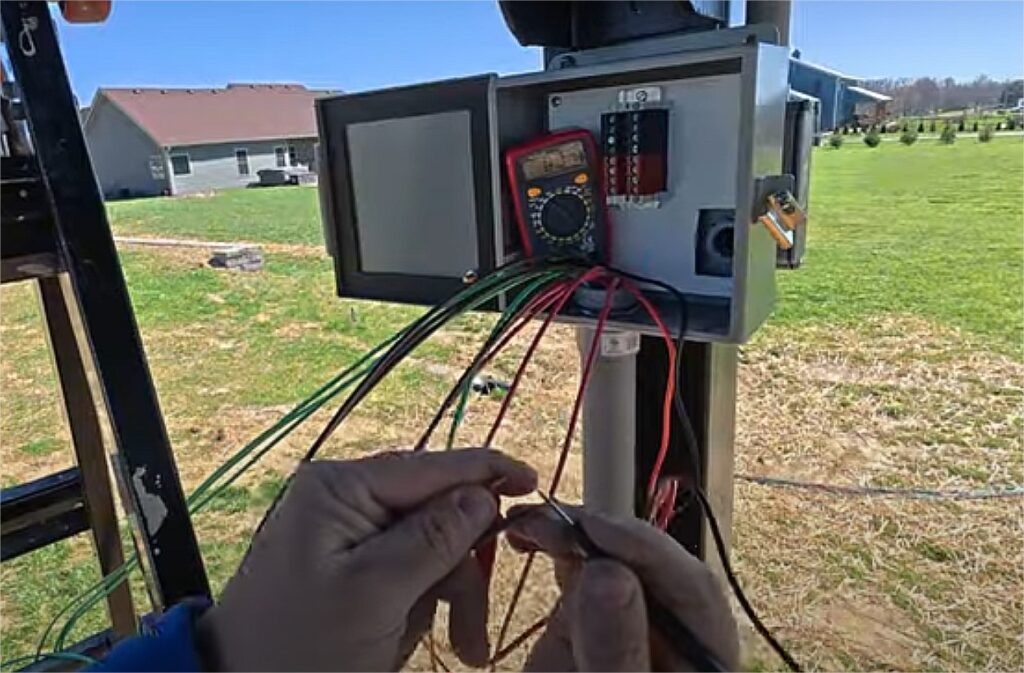
- 13 wires in total routed through conduit—making the pull process physically demanding
Why so much wire?
- The distance between the solar array and combiner box
- Compliance with safety codes (especially grounding requirements)
- Future-proofing with extra wire length for flexibility
Each microinverter includes a dedicated ground wire that connects to the combiner box. Although expensive (due to copper costs), these steps are crucial for a safe, code-compliant system.
Combiner Box Challenges and Smart Fixes

Setting up the combiner box came with its own physical design hurdles. The installer had to modify the backplate and drill precise holes to accommodate bushing, DIN rails, and a grounding bar—all while ensuring no sharp edges could damage wires.
Here’s what made it work:
- Filing and sanding the conduit holes for smoothness
- Installing a DIN rail and grounding bar without compromising the box’s rear integrity
- Ensuring all wiring could enter without bending or kinking
The attention to detail—like tucking in cables, adding bushings, and later sealing with glue—ensured long-term durability and safety. Every piece had to fit like a puzzle for clean functionality.
Microinverter Wiring and Click-to-Connect Simplicity
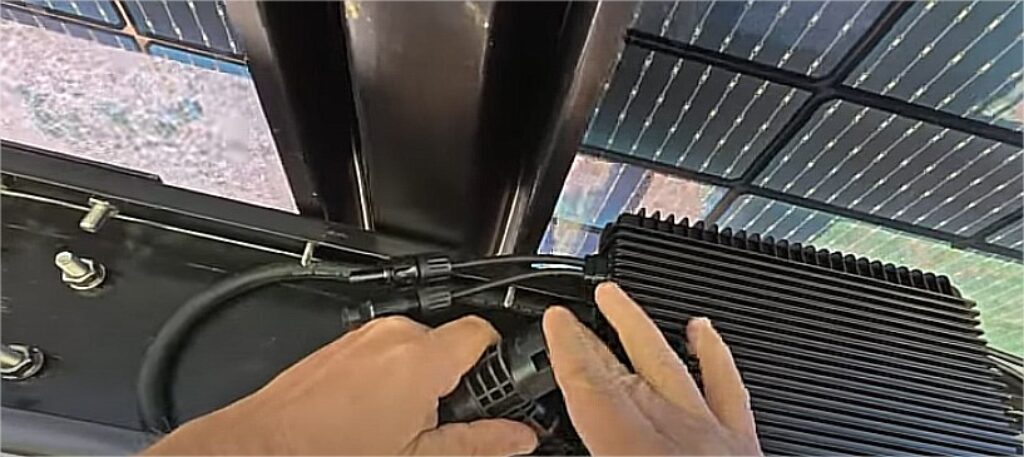
One of the standout aspects of Hoymiles HMS models is the plug-and-play wiring. Using the NA10-300 cables specifically designed for this system, connections became:
- Fast: Snap-on T-branch connectors saved time
- Flexible: Modular design allowed logical cable management
- Safe: Watertight end caps sealed all open ends
The process included:
- Connecting red, green, and black wires into each T-connector
- Snapping cables from panel to microinverter with audible clicks
- Zip-tying and tucking wires for a clean aesthetic and functional layout
In the past, similar setups required complex wiring techniques. With Hoymiles, even disconnection is simple—just unplug, even while on a ladder.
Real-World Performance and Early Results
The installed system features 415W panels by Sirius Solar, distributed through Hoymiles HMS-1000 dual microinverters. The panels were mounted on a custom-built carport—ideal for maximizing sunlight exposure.
Despite the cloudy skies during testing, the results were impressive:
- Regular output of 9.4 to 9.7 kilowatts, just below the STC (Standard Test Conditions) max rating
- No observable clipping on the microinverters—even with peak sunlight gain
- Significant bifacial gain on the panels thanks to carport reflectivity
Compared to a previous system (370W panels and older microinverters), this setup delivered:
- Better efficiency
- Reduced clipping
- Higher power yield—even under cloud cover
And yes—bird mesh is essential. Birds had already started nesting within days, so mesh installation is underway to preserve system integrity.
Key Takeaways: Pros and Considerations

What’s to love:
- Efficient modular microinverter design
- Plug-and-play connectivity
- High real-world power output
- Easy maintenance and upgradability
- Strong performance even on cloudy days
Challenges to prepare for:
- Extensive wiring needs if solar array is far from the combiner box
- Physical trenching and conduit work is labor-intensive
- Bird protection must be planned upfront
Final Thoughts: The Power of Smart Planning
Installing a solar system isn’t just about panel wattage or inverter specs—it’s about planning every step, from trench depth to cable slack. This installation shows that with quality components like Hoymiles microinverters and careful attention to layout, you can build a high-performing, resilient solar solution that meets both personal and code requirements.
Whether you’re adding solar to your garage, backyard, or a custom carport like this one, Hoymiles makes the technical part easier—so you can focus on harnessing clean energy without headaches.