Solar power is booming, but when it comes to installing panels on metal roofs, reliable information is surprisingly scarce. Metal roofs are common on agricultural buildings and modern homes, yet most installation guides focus on shingles. This blog unpacks a detailed step-by-step DIY solar setup using in-phase microinverters and IronRidge mounting hardware—tailored specifically for metal roofs.
Whether you’re a DIY enthusiast or a homeowner trying to save thousands on solar installation, understanding how to mount, wire, and connect a solar system safely and legally is essential. Let’s break down this highly practical and cost-effective approach.
Unique Hardware for Metal Roof Attachment
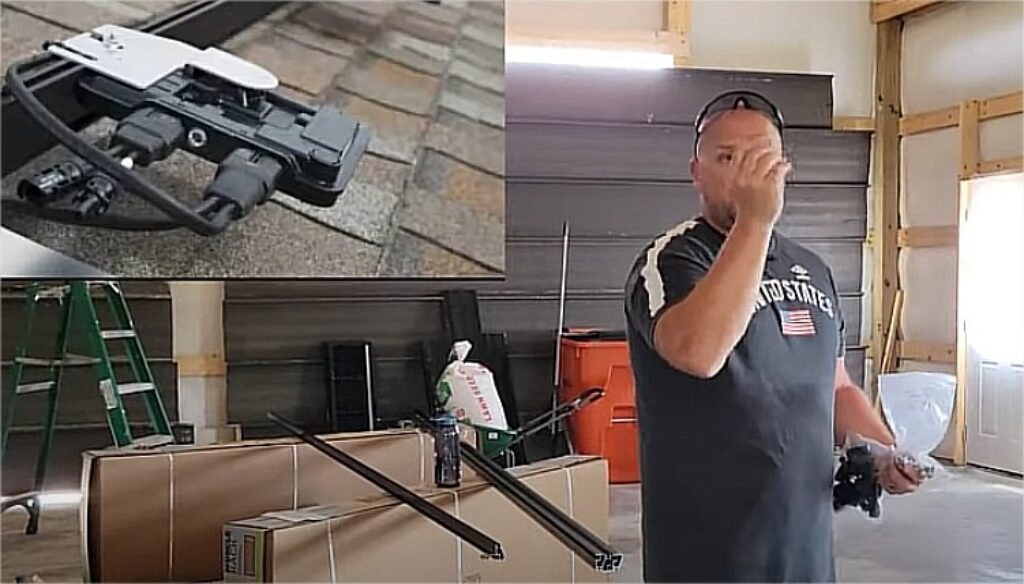
Metal roofs require distinct mounting systems that preserve the roof’s integrity.
- Use of s5 Solar Foot: Designed to clamp securely to metal seams without drilling holes.
- IronRidge Rails & Brackets: Offer strength and flexibility while adapting to various panel layouts.
- Grounding System: Copper wire grounding ensures conductivity and safety across all panels.
Proper hardware not only prevents leaks but also avoids invalidating your roof warranty. This phase demands precision and adherence to best practices.
Microinverters & Wiring: Compatibility is Key
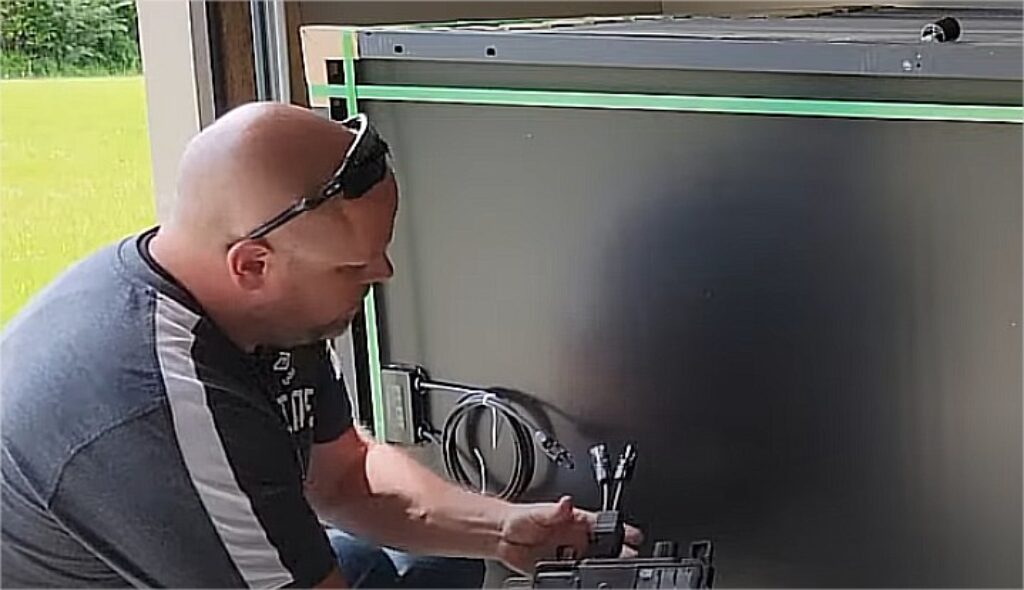
In-phase microinverters bring simplicity, but they also require system-specific wiring.
- Specialized Cables: 27-connector in-phase wires, UV clips, and end caps ensure seamless compatibility.
- No Generic Substitutes: Using standard solar wires may cause performance issues or even failure.
- Moisture Protection: System integrity depends on water-tight seals and outdoor-rated connections.
This isn’t just plug-and-play; investing in the correct components upfront prevents costly issues later.
The Solo Box: Innovation in Waterproofing
Waterproofing metal roofs can be tricky, but the UniRac Solo Box offers a clever solution.
- Silicone Seal Port: Enables tight seals through the rear panel—no traditional flashing needed.
- Less Roof Penetration: Reduces potential leak points with fewer holes and simpler mounts.
- Durable Construction: Engineered specifically for metal roofing challenges.
The solo box makes one of the most frustrating parts of solar installs—roof penetration—far more manageable.
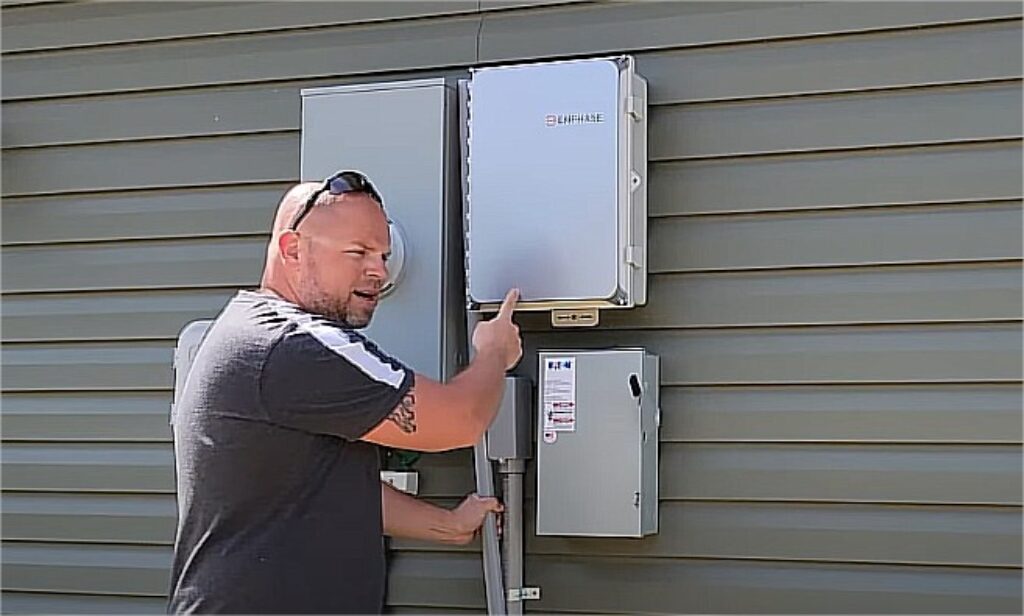
Wiring to Combiner, Disconnect, and Main Panel
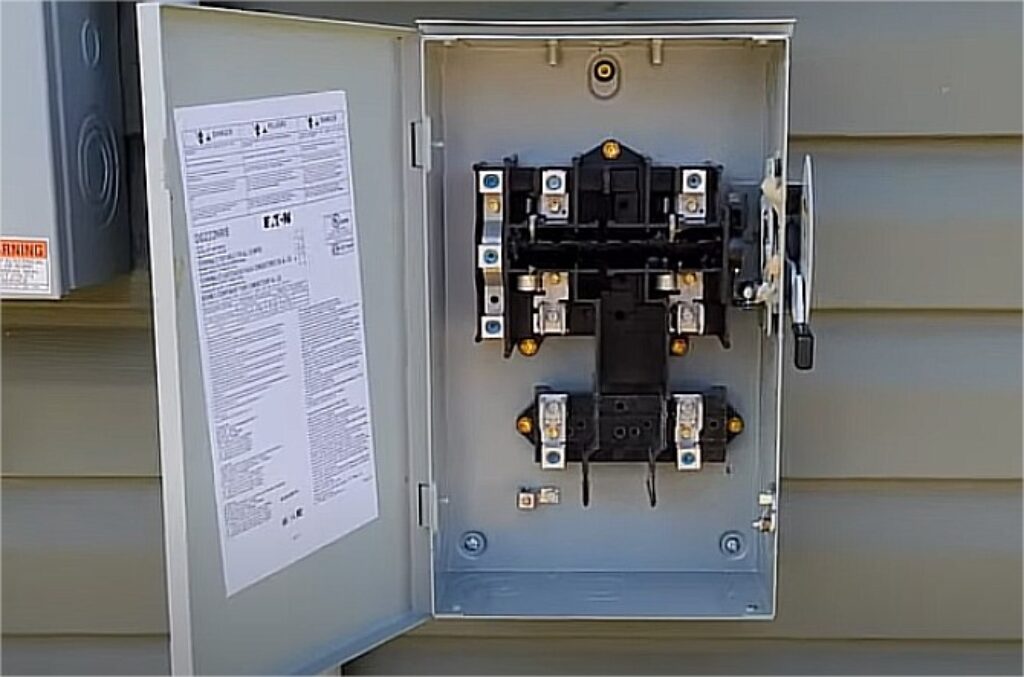
Running wires from your roof to your electrical system must follow code and safety standards.
- THHN Wiring: 12-gauge wires for hot lines, 6-gauge solid copper for grounding.
- Schedule 40 & 80 Conduit: Schedule 80 is used for exposed areas; Schedule 40 is fine indoors.
- Three-Branch Combiner: Brings together wiring from multiple strings of panels before routing to main panel.
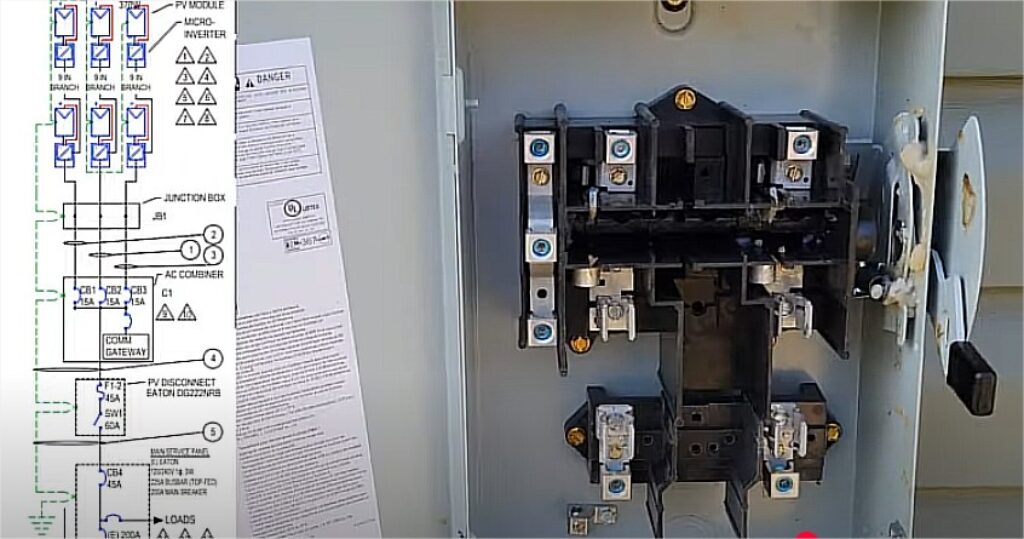
This setup demands planning—especially for layout, voltage drop, and breaker compatibility.
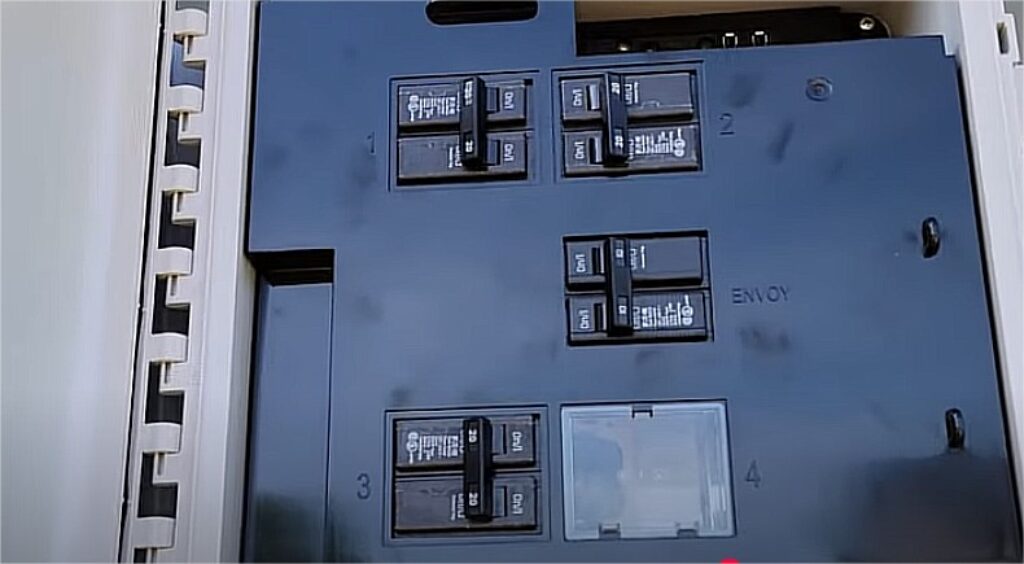
Labeling, Breakers, and Inspection-Ready Setup
Final connections aren’t just mechanical—they’re legal and safety-bound.
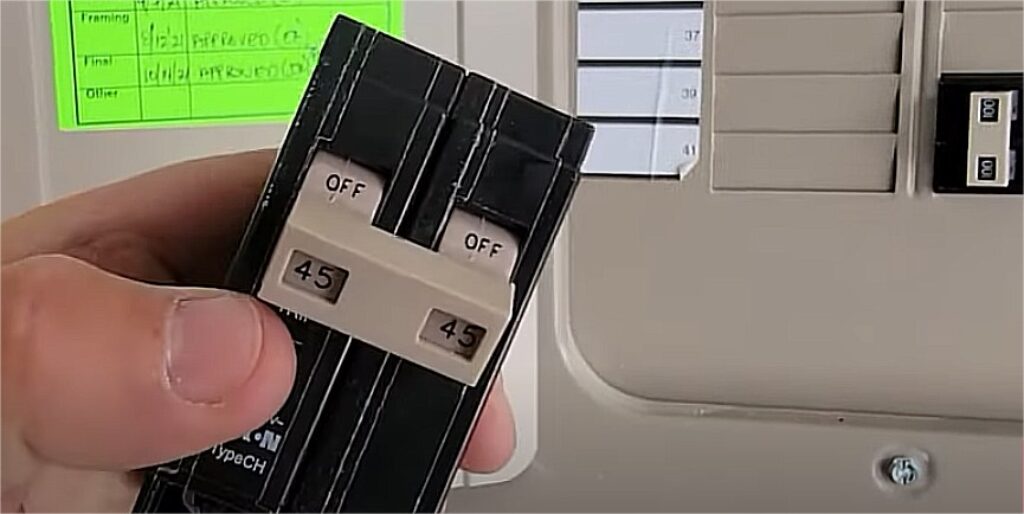
- Use Proper Breakers: A 45-amp backfeed breaker is required in many grid-tied systems.
- Code-Compliant Labels: Label every line, disconnect, and junction box as per NEC standards.
- Plan for Inspection: DIYers often fail inspection due to minor oversights. Don’t be that person.
Invest time here and you’ll avoid costly rework, delays, or compliance failures.
Massive Cost Savings Through DIY Installation
Hiring a professional solar installer often costs double or triple the DIY route.
- Professional Quotes: $56,000–$85,000 for a fully installed grid-tied system with battery backup.
- DIY Cost Estimate: Around $25,000–$30,000, depending on location and materials.
- Savings Potential: Tens of thousands saved by putting in the time and research.
For motivated homeowners, this financial incentive makes the learning curve well worth the climb.
Panel Layout: Maximizing Space & Efficiency

Smart panel placement improves both performance and installation simplicity.
- Portrait vs. Landscape: Depends on roof size and inverter wire lengths.
- Staggering Rows: Helps with roof obstructions and improves wiring flow.
- Distance Matters: Cable run limits from inverters to the combiner must be respected.
Strategic layout planning is more than aesthetics—it’s about optimizing for real-world constraints.
Conclusion: Empowering Solar Independence
This video-based guide reveals what solar companies often keep behind expensive quotes. With the right parts, careful planning, and a commitment to learning, installing your own solar system on a metal roof becomes entirely feasible.
By mastering unique mounting hardware, using compatible microinverters, ensuring water-tight installations, and following code-compliant wiring, you can power your home while saving big. DIY solar isn’t just possible—it’s practical and empowering.